
Ejemplo Adaptador XML
Descripción
Los documentos o archivos XML forman una estructura de tipo árbol, comenzando desde la raíz. Se componen de etiquetas que nos aportan datos e información que queremos procesar. Estas etiquetas pueden estar de forma individual o anidadas.
Habitualmente un archivo XML incluye mucha información y debe de ser procesada correctamente por el usuario, en este caso el desarrollador. Cuanto más grande sea un archivo XML nos estará indicando que más información trae.
Lo primero que debemos saber de un archivo XML es que siempre contendrá una única etiqueta dando la introducción a dicho archivo, y a partir de ella podremos crear cualquier tipo de archivo XML. Dentro de estos archivos XML tendremos una o varias etiquetas, que a su vez tendrán otras etiquetas, que podrán estar o no anidadas.
Las etiquetas en un XML deben quedar bien cerradas, nunca deben acortarse. Cada una tiene su inicio y su fin, y si eliminásemos alguna de estas etiquetas, a la hora de procesar el documento nos daría un error. Si se produce un error, se cortaría el proceso de almacenamiento de información en cualquier tipo de lenguaje de programación y no podríamos seguir con su procesado.
TAST ha creado este Adaptador XML que nos permite interactuar con un archivo .xml, y gracias al conjunto de funciones que tiene podemos recuperar, revisar, copiar y modificar el contenido del archivo. También permite guardar el documento modificado.
Enunciado del ejercicio
En este ejemplo partimos de un archivo XML. Le pediremos a TAST que genere una copia de este archivo en su estado actual, para añadirlo como prueba. Luego devolverá el número de ocurrencias de un elemento, buscando por su TagName y también por su XPath obteniendo el mismo resultado; después recuperará la cadena de texto de los elementos del array, buscando por XPath y por su TagName; reemplazará el texto del elemento, buscando por Tag Name y Position. Finalmente guardaremos este nuevo archivo XML con los cambios, en la ruta y con el nombre que indiquemos. Si no se especifica la ruta, se guardará en la carpeta log.
Resolución del caso de prueba
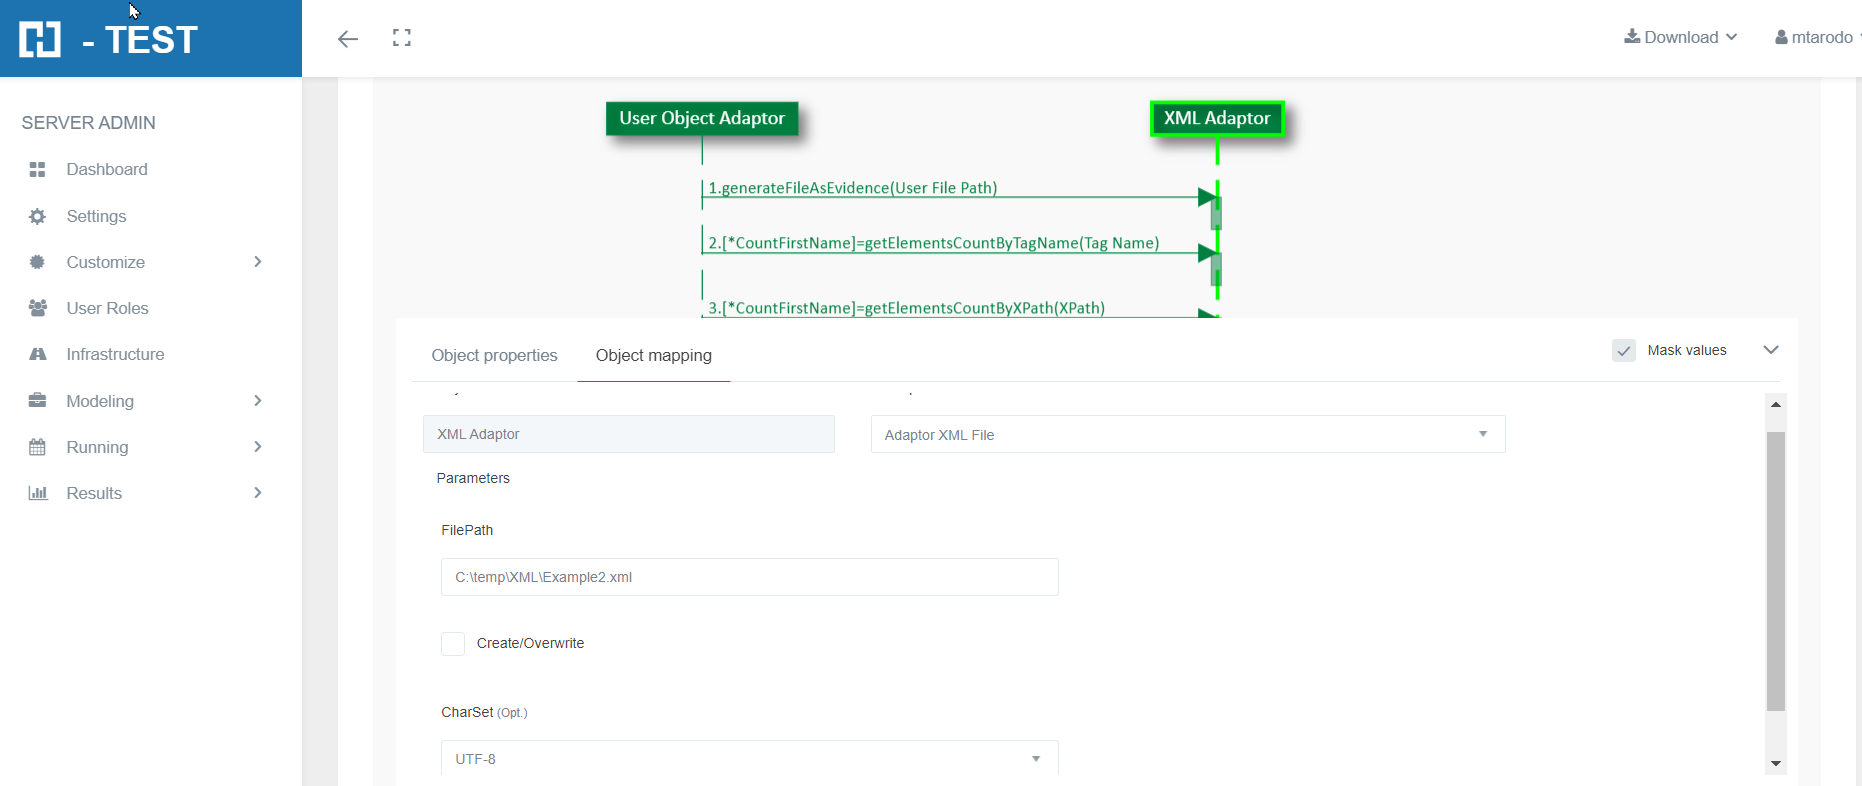
Como parte del proceso de mapeo, deberemos proporcionar la información del adaptador, relativa a su conexión y uso. Le indicaremos:
- FilePath: la ruta completa donde esta guardado el archivo:
-
- C:\temp\XML\Ejemplo2.xml
- C:\temp\XML\Ejemplo2.xml
-
- CharSet: el conjunto de caracteres usados en el archivo con el que vamos a trabajar. Este dato en este adaptador es opcional. En la imagen siguiente está indicado con la flecha roja.
- Create/Overwrite: cuando la casilla de verificación está marcada, TAST creará un nuevo archivo o lo sobrescribirá si el archivo ya existe.
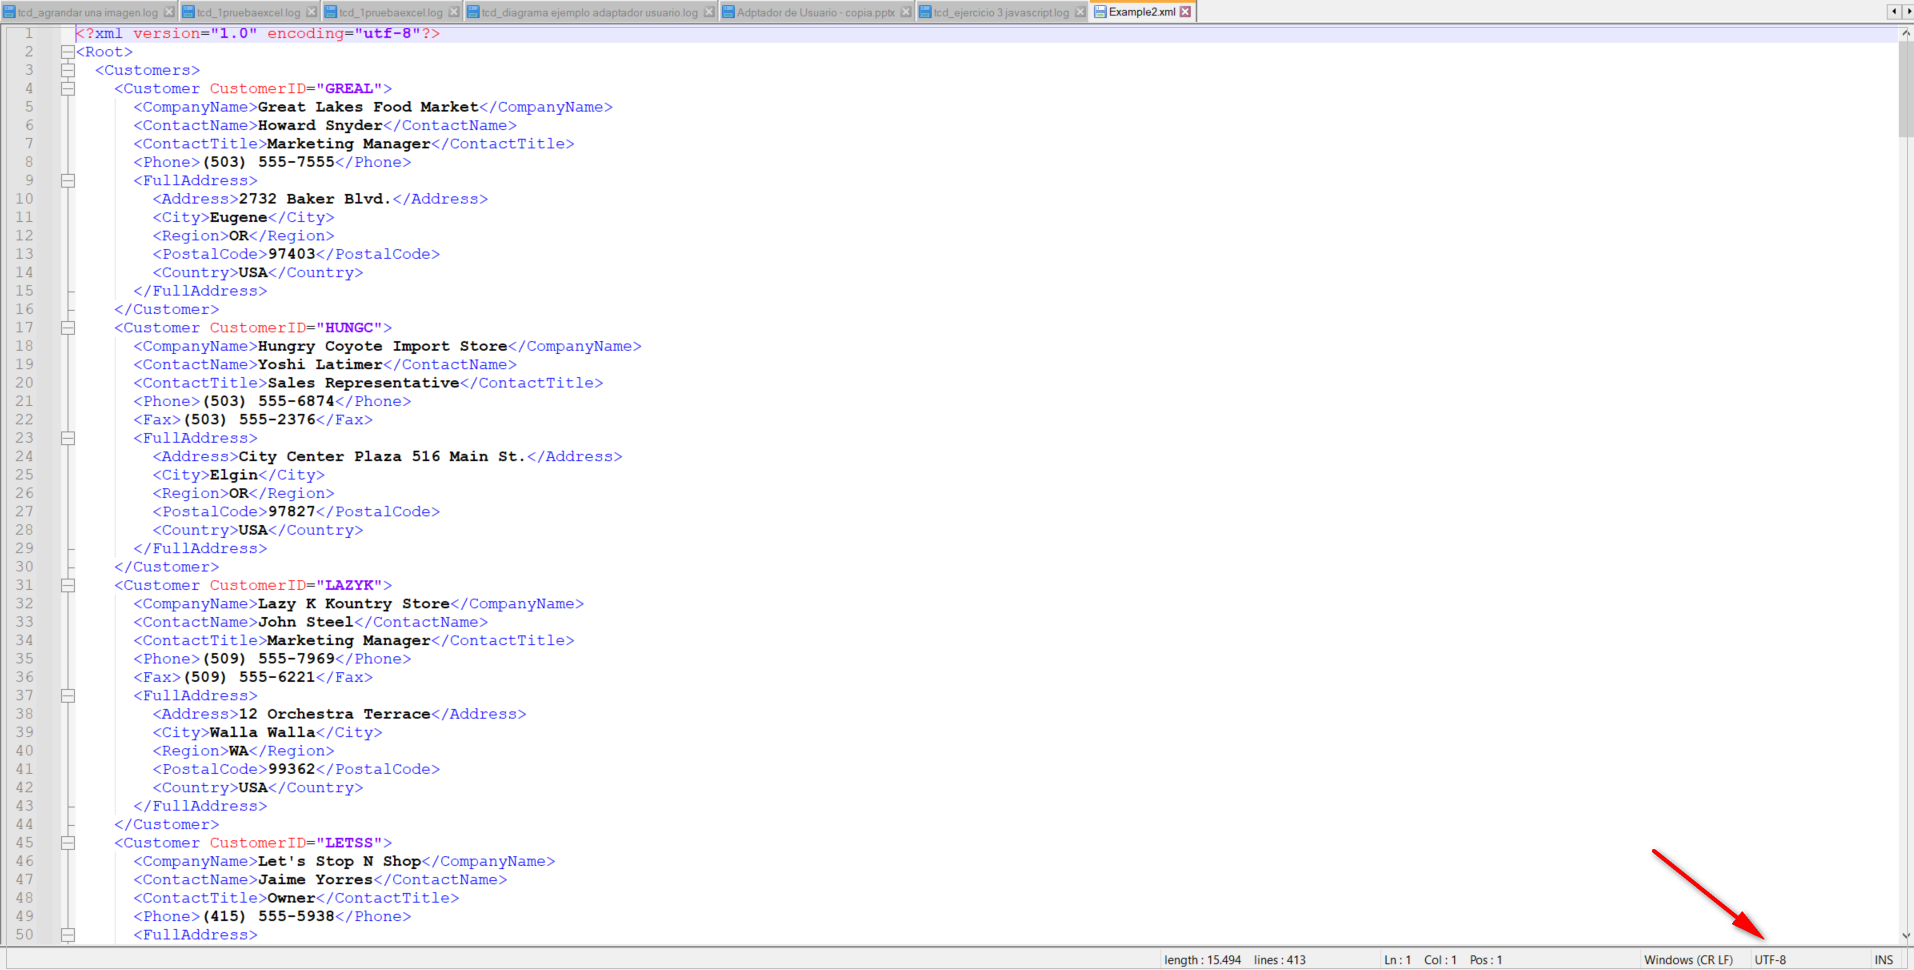
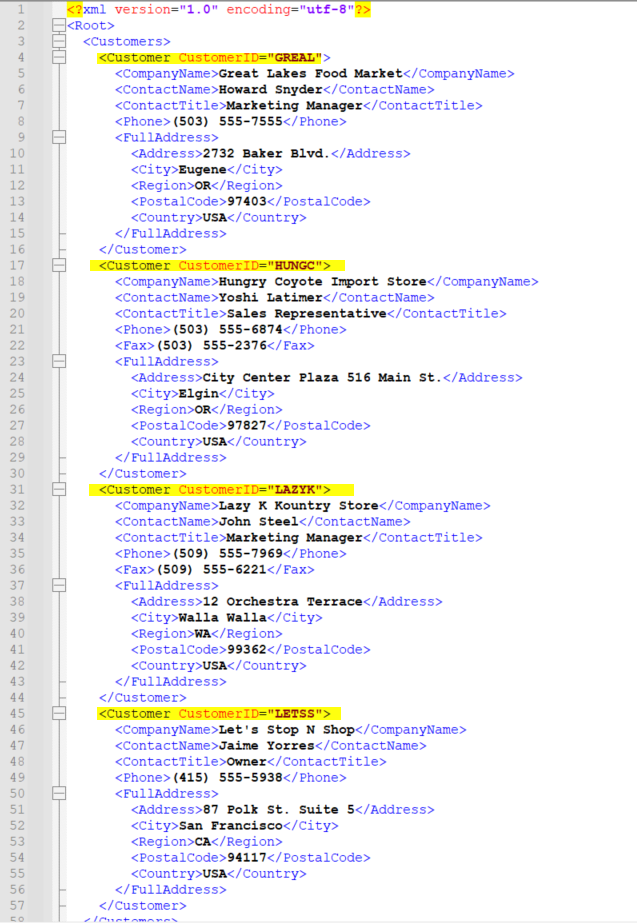
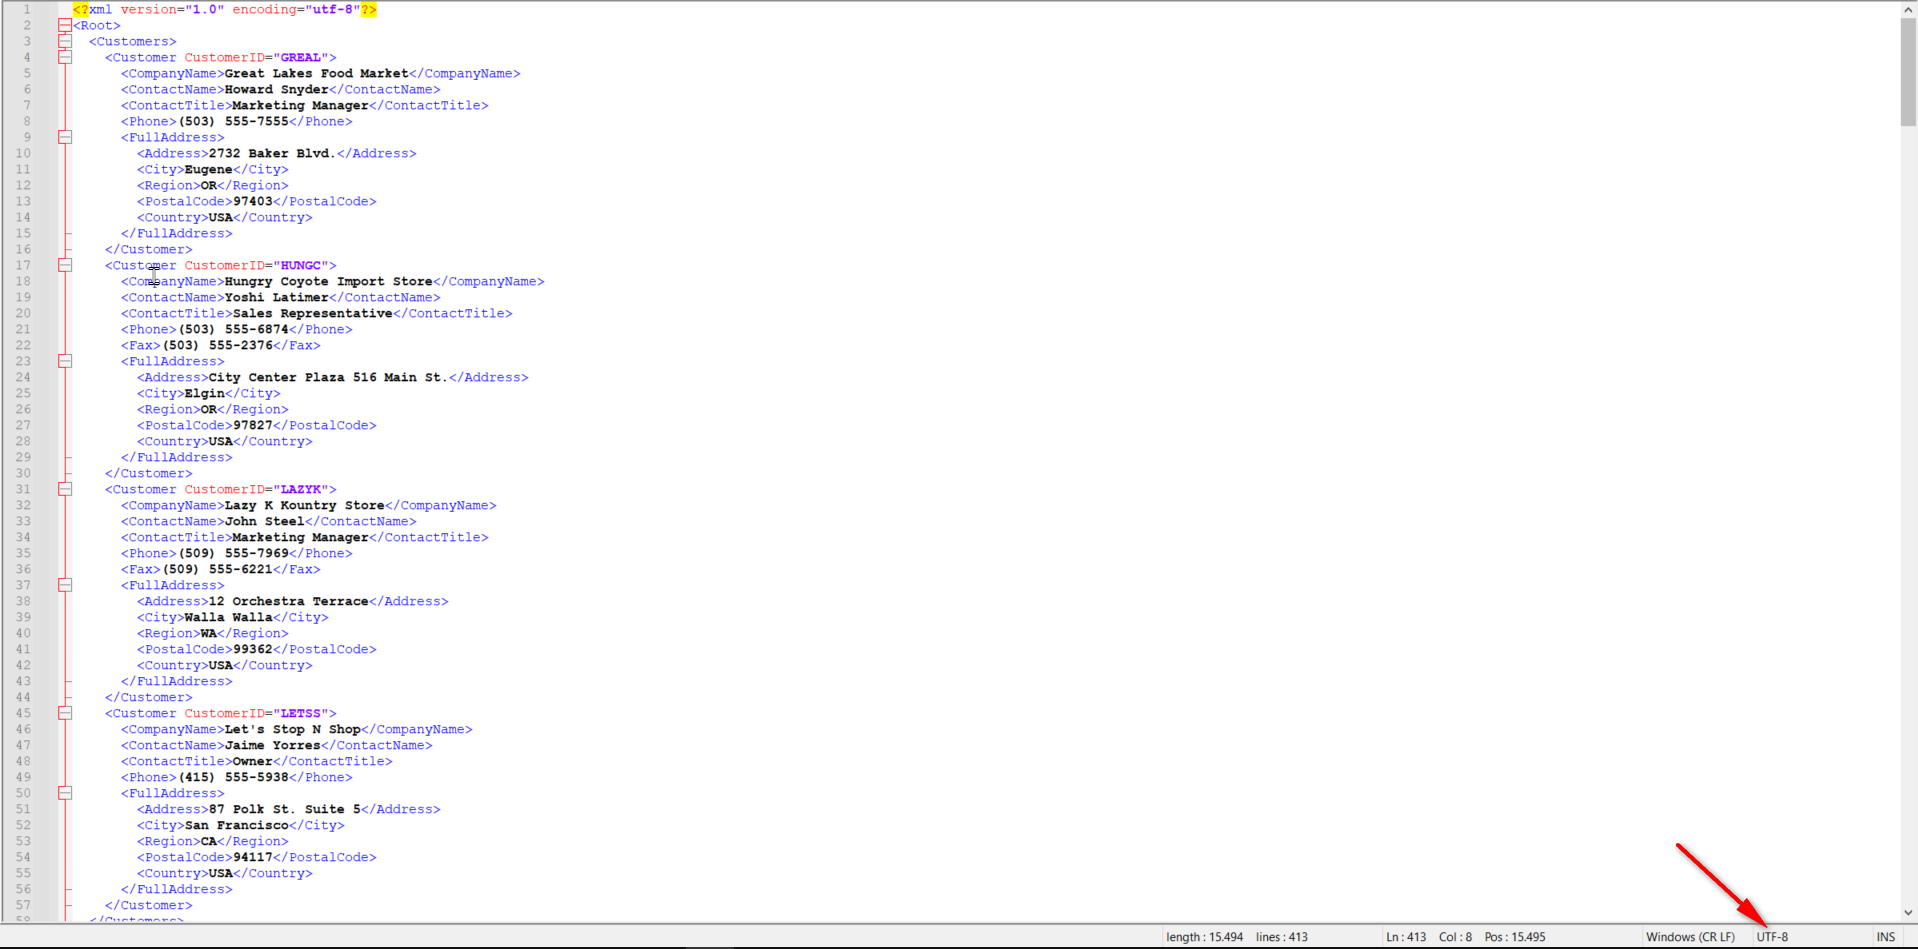
Este es el archivo Ejemplo2.xml que vamos a necesitar para este caso de prueba.
Este es el enlace al siguiente diagrama: https://app.htest.testautomationsystemtool.com/opendiagram?id=205Diagrama Ejemplo Adaptador XML
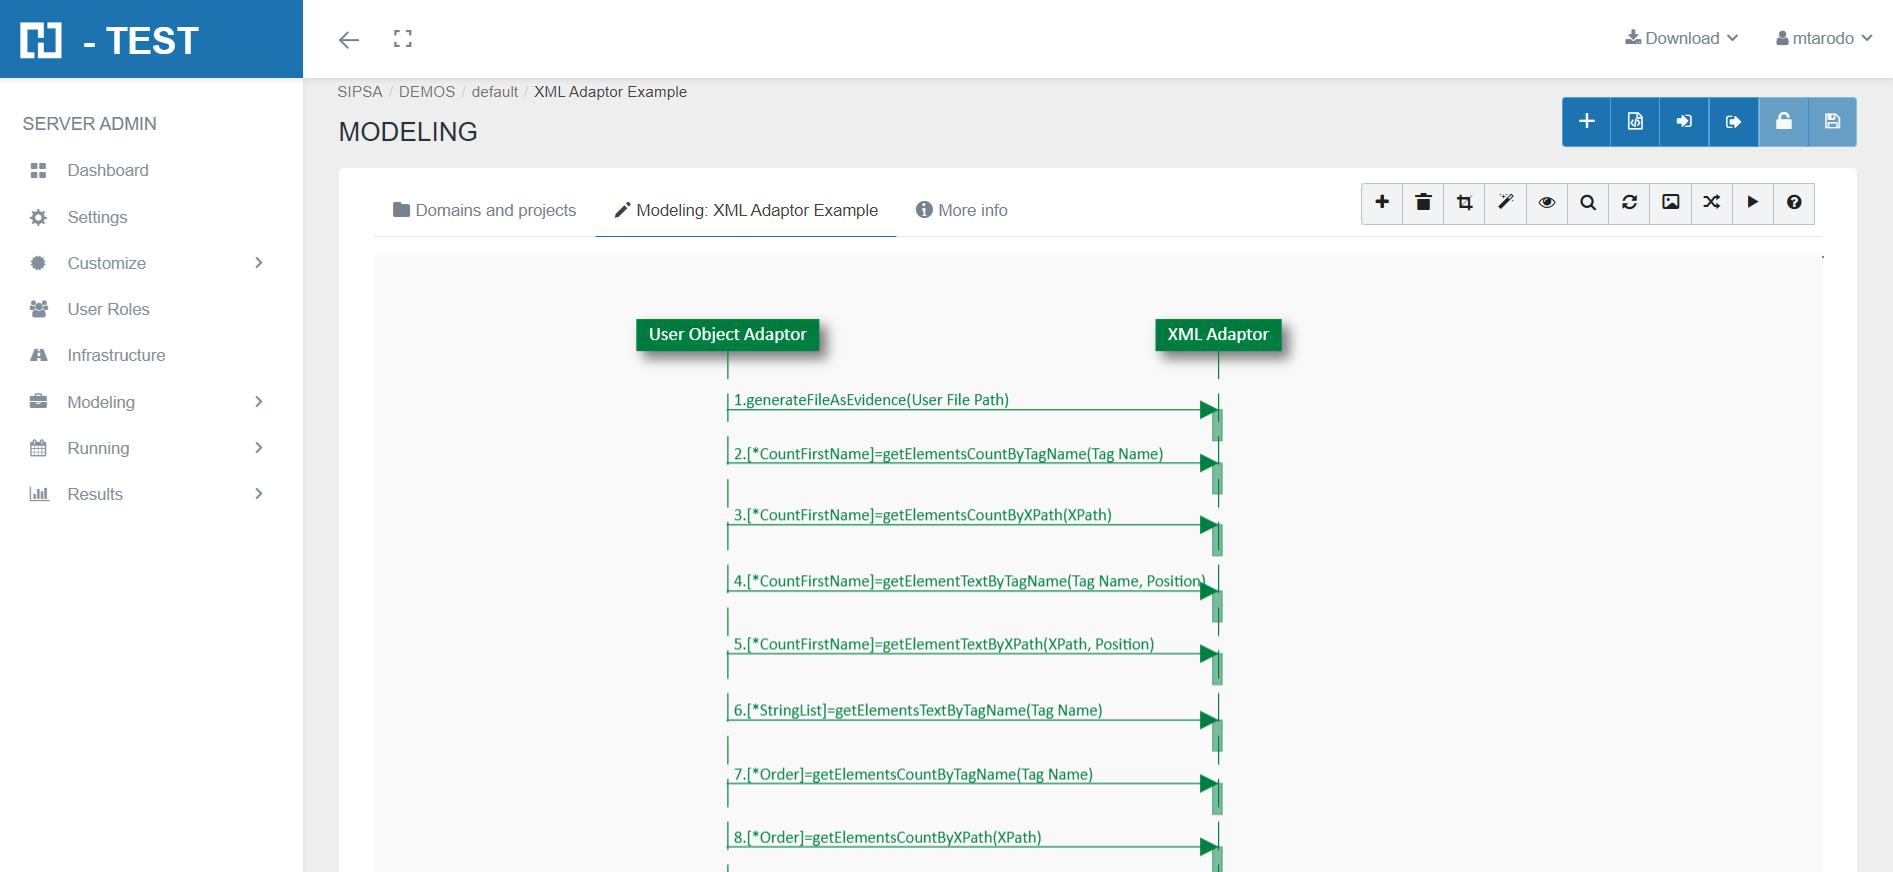
Functions we have used with XML Adaptor:
- generateFileAsEvidence(): the function generates a copy of the XML file in its current state, to be added as evidence. It does not require an input parameter.
- getElementsCountByTagName(TagName): returns the number of occurrences of the element, searching by TagName. We will return four
- getElementsCountByXPath(XPath): returns the number of occurrences of the element, searching by XPath. We have to add at the beginning a /. It will also return four which is the number of times Customer appears.
- getElementTextByTagName(TagName, Position): returns the text of the element, searching by TagName and Position.
- replaceElementTextByXPath(Xpath, Position, New Text): replaces the element´s text, searching by XPath and Position. We have to add at the beginning a /.
- saveAs(Path, FileName): saves XML to the user path. Saves to the log folder if the path is not specified.
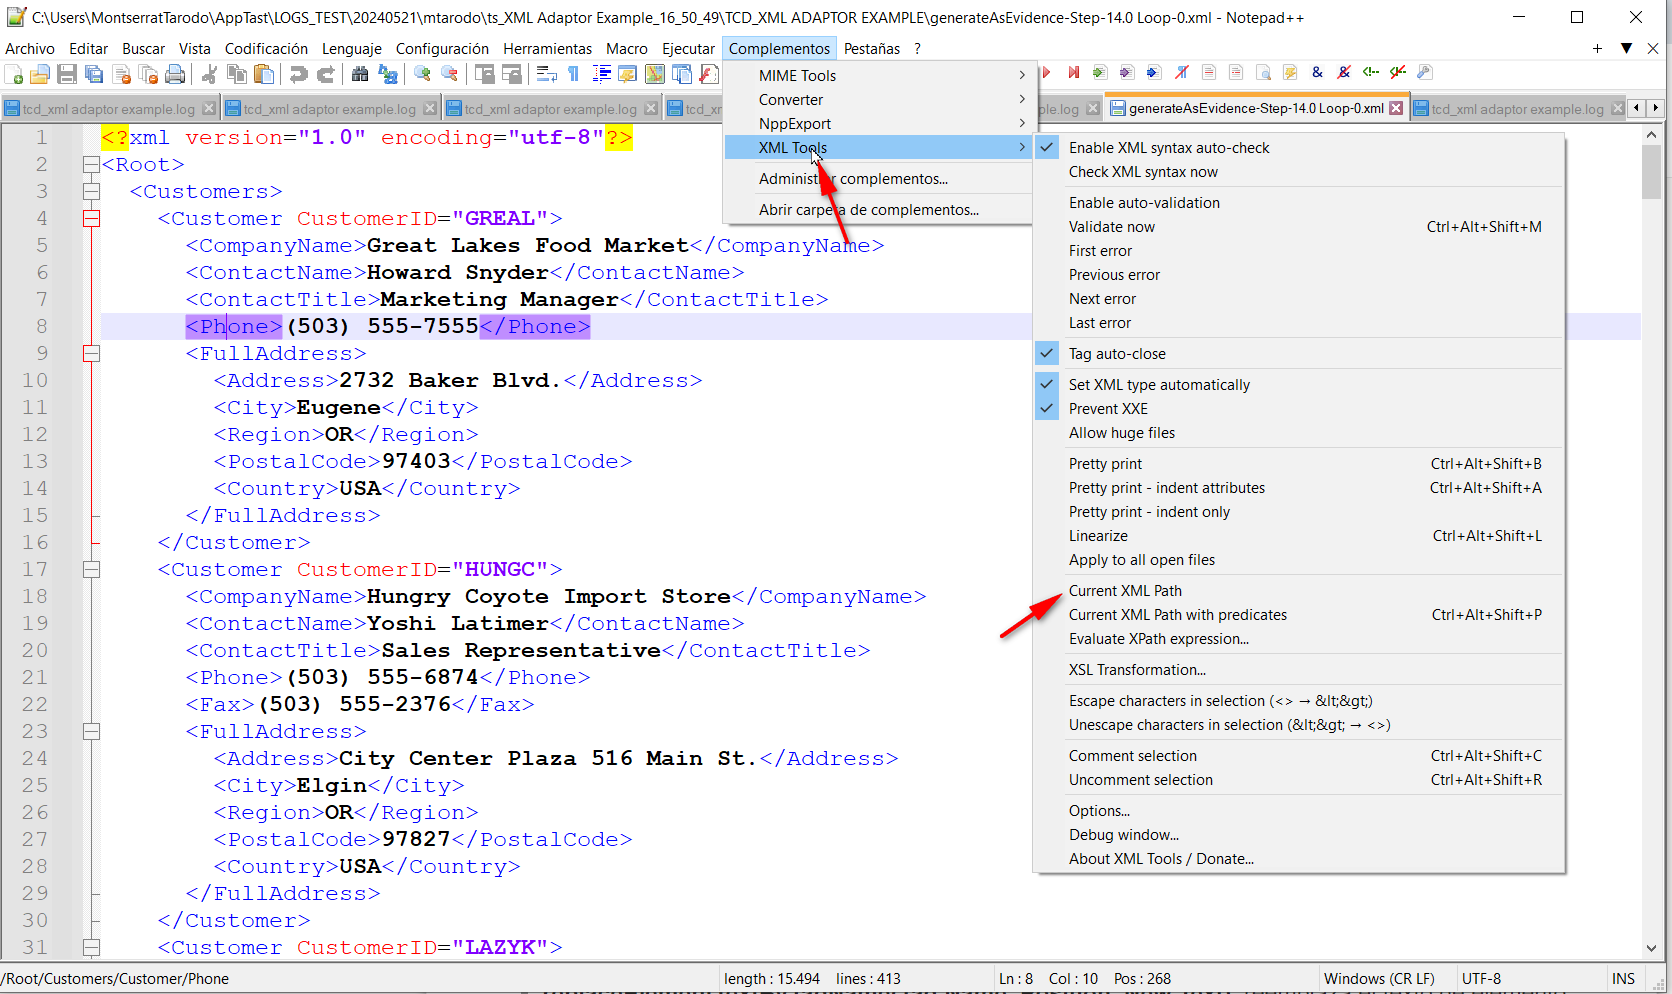
You can also make the search by its XPath. We can do it either by pressing (Ctrl + Shift + P) or through the Plugins > XML Tools > Current XML Path tab.
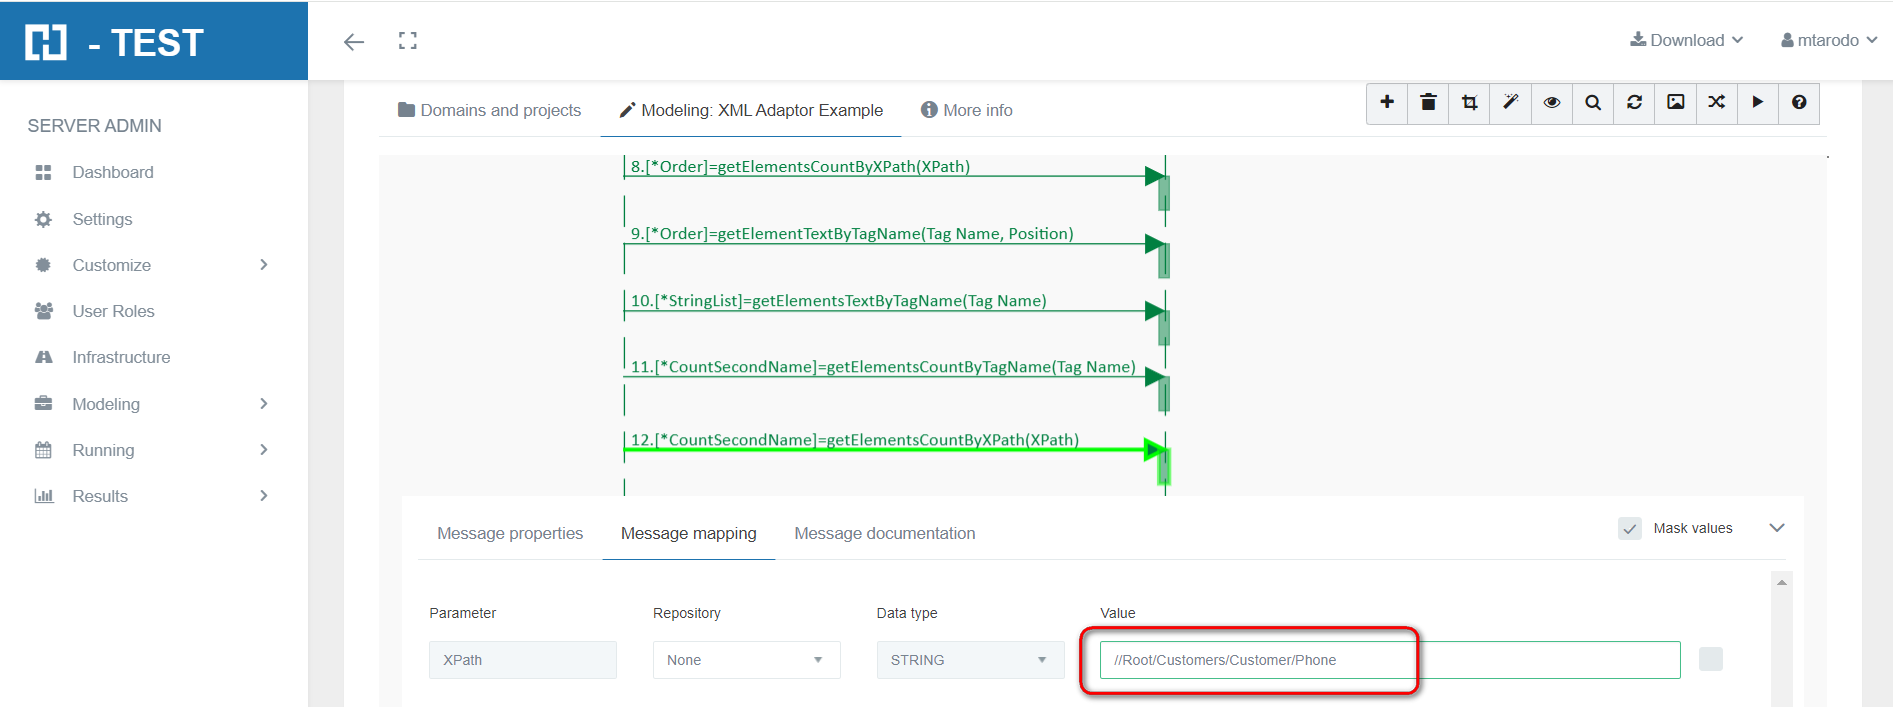
It will be copied to the Clipboard, until we add it in the Mapping tab of the object.
Resolución del caso de prueba
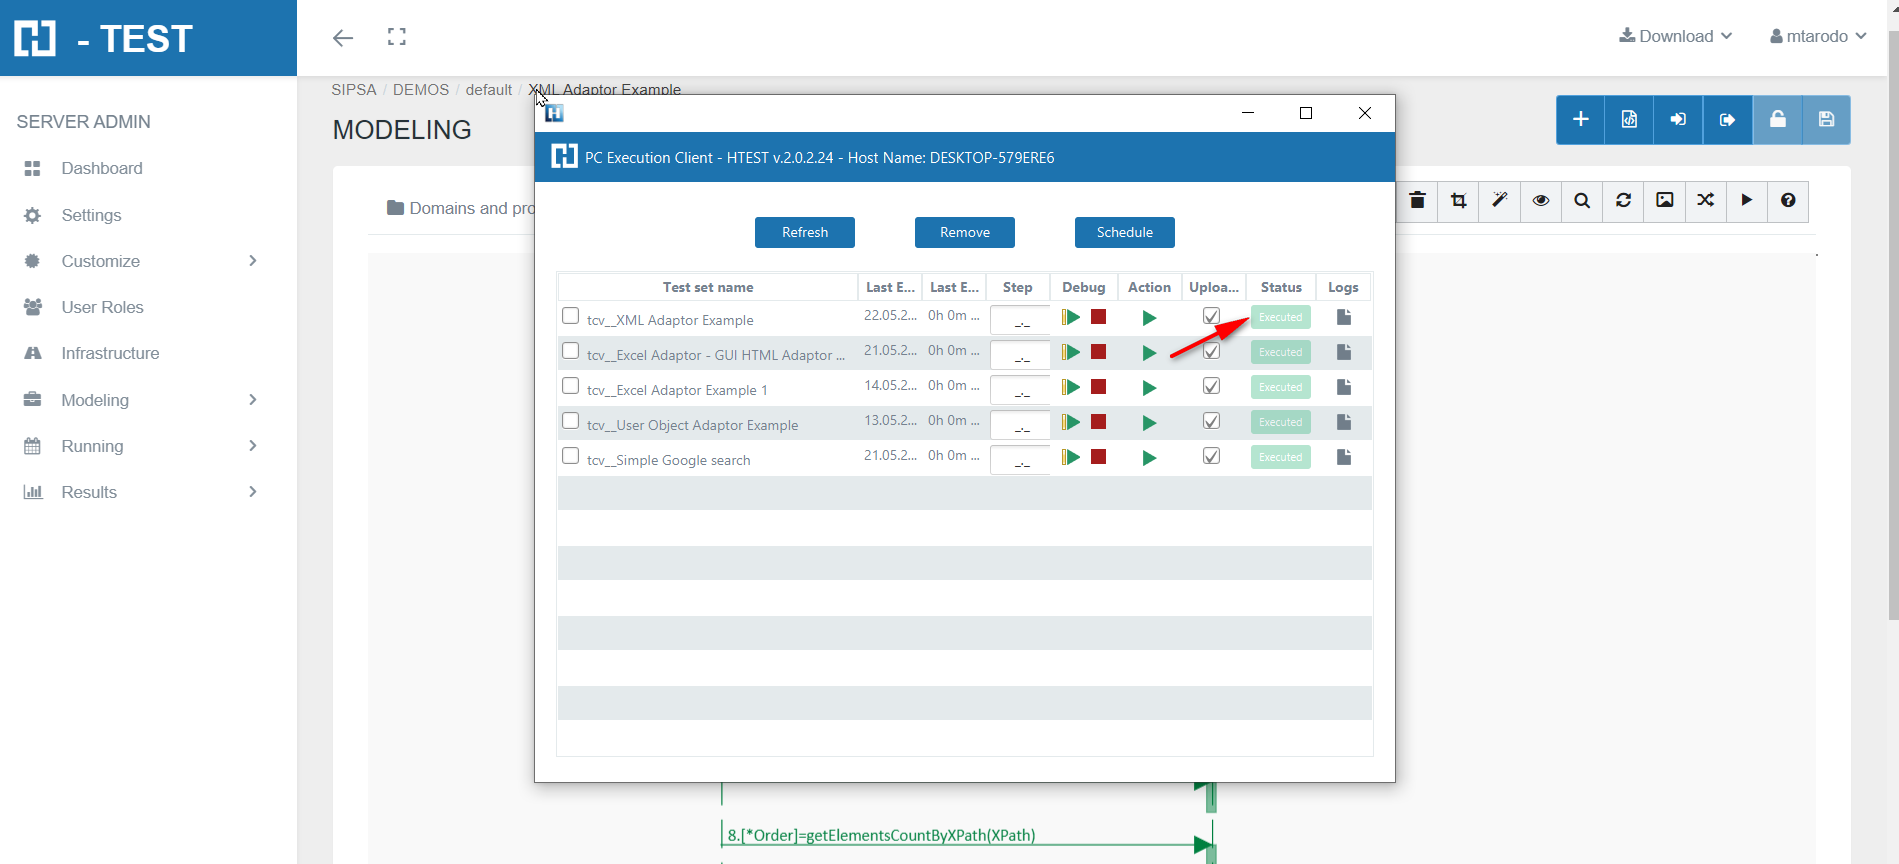
When we finish executing this test case, we see if it has been executed correctly:
Captura de resultados
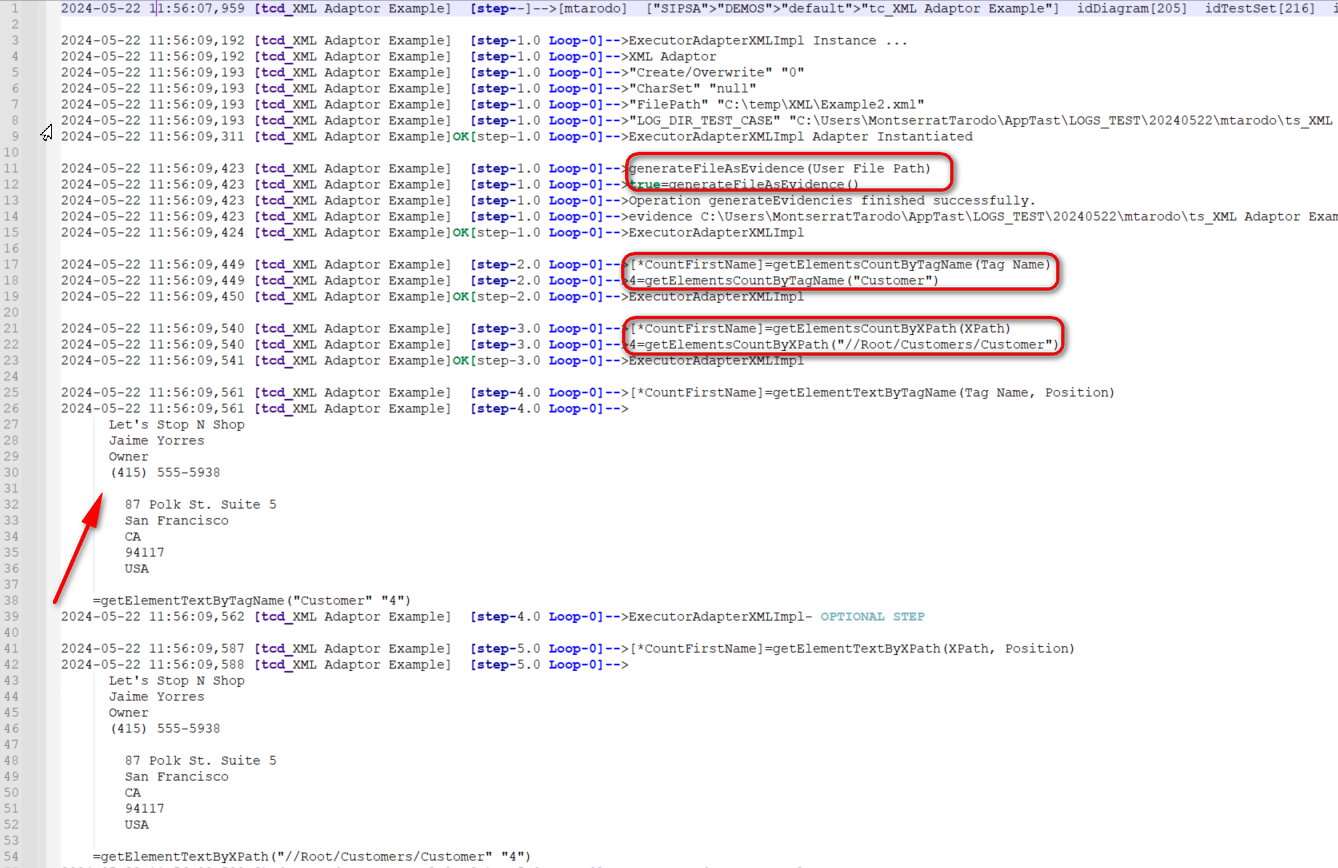
We then open the icon on the right (marked with a red arrow) and we have as a result the evidence folder, where both the log of the execution is stored, as well as all the screenshots, files, etc... if we have checked the "Evidence" box in the general settings of the diagram.
Carpeta de evidencias

Log de la ejecución
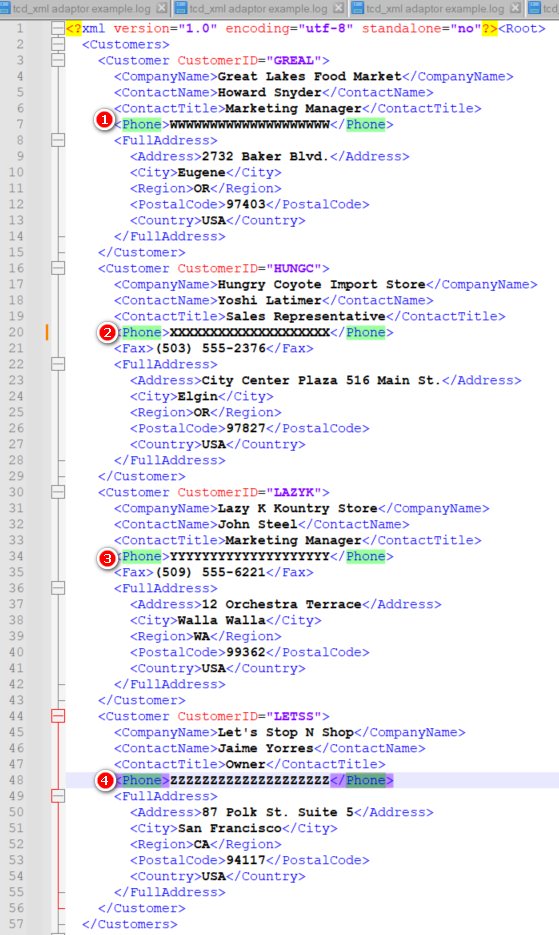
Results2.xml
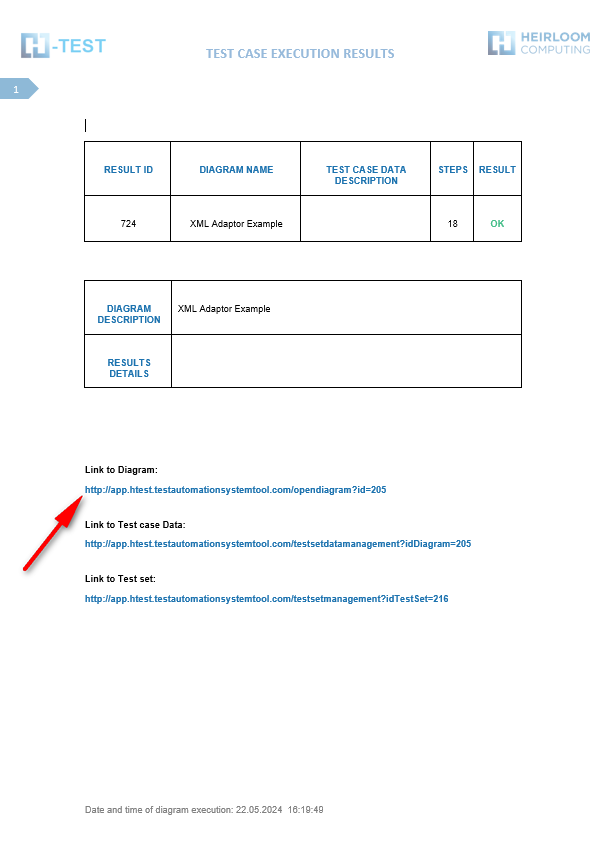
When returning the results, H-TEST returns a Word document, detailing the steps we have taken, the results obtained from each step, the links to the diagram and the test set, if we have clicked on download document in the Results box.
The XML adapter allows you to interact with an .xml file, offering a set of Predefined Functions so that you can retrieve, review and modify the contents of the file. It also allows you to save the modified document.
Statement of the exercise
In this example we start from an archivo XML file. We will ask H-TEST to generate a copy of this file in its current state, to add it as a test. Then return the number of occurrences of an element, searching by its TagName and also by its XPath obtaining the same result; then retrieve the text string of the array elements, searching by XPath and by its TagName; replace the element text, searching by Tag Name and Position. Finally we will save this new archivo XML file with the changes, in the path and with the name that we indicate. If the path is not specified, it will be saved in the log folder.
Solving the test case
As a part of the mapping process, you should provide the adaptor’s information, regarding to connect and use it. As initialization parameter we will indicate the complete path of the file (File Path)
- FilePath: complete path of the file: C:\temp\XML\Example2.xml
Example2.xml
This is the link to the following diagram: https://app.htest.testautomationsystemtool.com/opendiagram?id=205
Functions we have used with XML Adaptor:
- generateFileAsEvidence(): the function generates a copy of archivo XML file in its current state, to be added as evidence. It does not require an input parameter.
- getElementsCountByTagName(TagName): returns the number of occurrences of the element, searching by TagName. We will return four
- getElementsCountByXPath(XPath): returns the number of occurrences of the element, searching by XPath. We have to add at the beginning a /. It will also return four which is the number of times Customer appears.
- getElementTextByTagName(TagName, Position): returns the text of the element, searching by TagName and Position.
- replaceElementTextByXPath(Xpath, Position, New Text): replaces the element´s text, searching by XPath and Position. We have to add at the beginning a /.
- saveAs(Path, FileName): saves XML to the user path. Saves to the log folder if the path is not specified.
You can also make the search by its XPath. We can do it either by pressing (Ctrl + Shift + P) or through the Plugins > XML Tools > Current XML Path tab.
It will be copied to the Clipboard, until we add it in the Mapping tab of the object.
Test Set Execution
When we finish executing this test case, we see if it has been executed correctly:
Capture of results
We then open the icon on the right (marked with a red arrow) and we have as a result the evidence folder, where both the log of the execution is stored, as well as all the screenshots, files, etc... if we have checked the "Evidence" box in the general settings of the diagram.
Evidence folder
Log of the execution
Results2.xml
When returning the results, H-TEST returns a Word document, detailing the steps we have taken, the results obtained from each step, the links to the diagram and the test set, if we have clicked on download document in the Results box.