Ejemplo Adaptador Host 3270
Descripción
A través del Adaptador Host 3270, TAST se conecta con un Host 3270 para realizar pruebas en él. Este adaptador nos permite por un lado ejecutar pruebas en pantallas Mainframe del Host y también generar macros que nos permiten automatizar pruebas en sistemas «transformados a HTML». También es posible realizar pruebas individuales con este adaptador o pruebas de extremo a extremo conectando con otros adaptadores.
Enunciado del ejercicio
Se trata de una navegación sencilla en un menú principal (ver cuentas bancarias y datos de ese tipo).
Resolución del caso de prueba
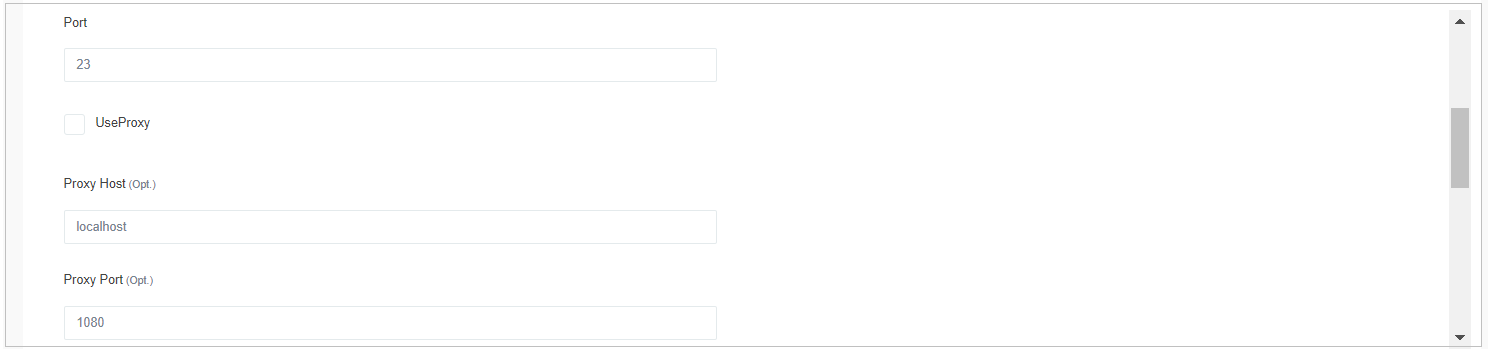
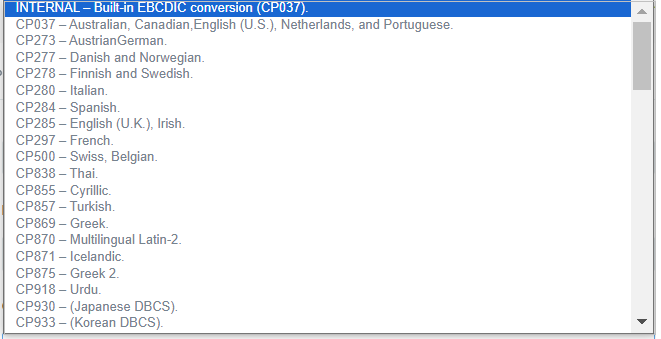
Lo primero que tenemos que hacer es proporcionar toda la información del Adaptador, relativa a su conexión y uso:


Este es el enlace al diagrama: https://app.cloud1.testautomationsystemtool.com/opendiagram?id=14476
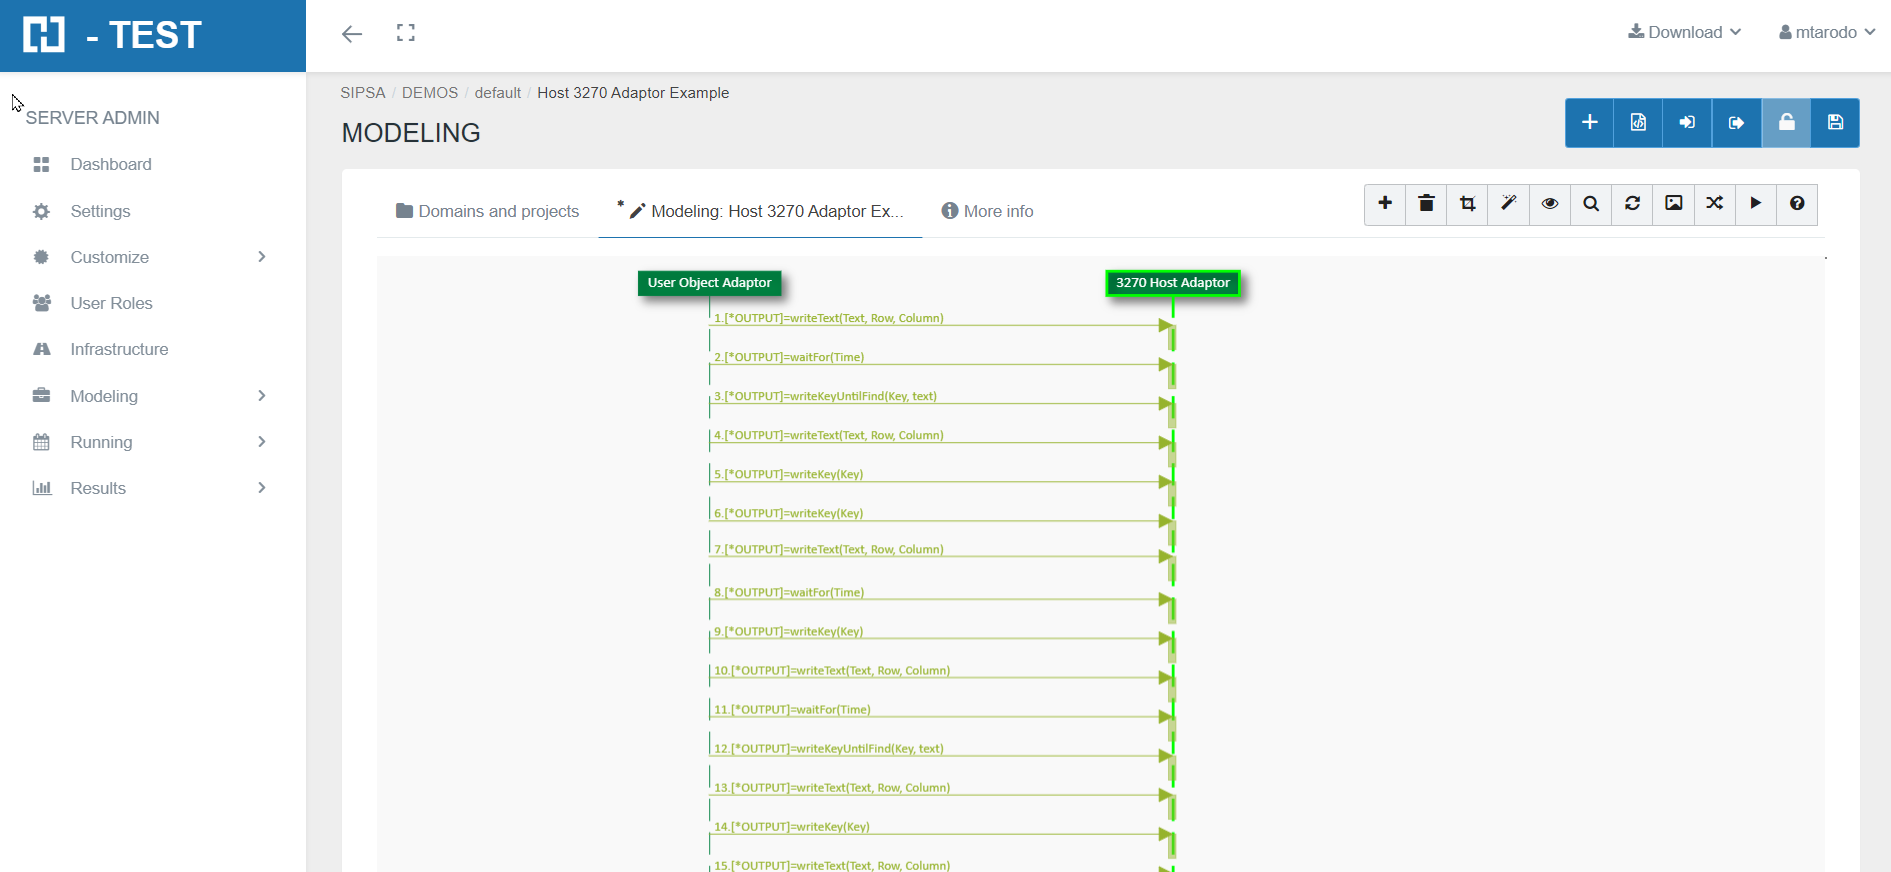
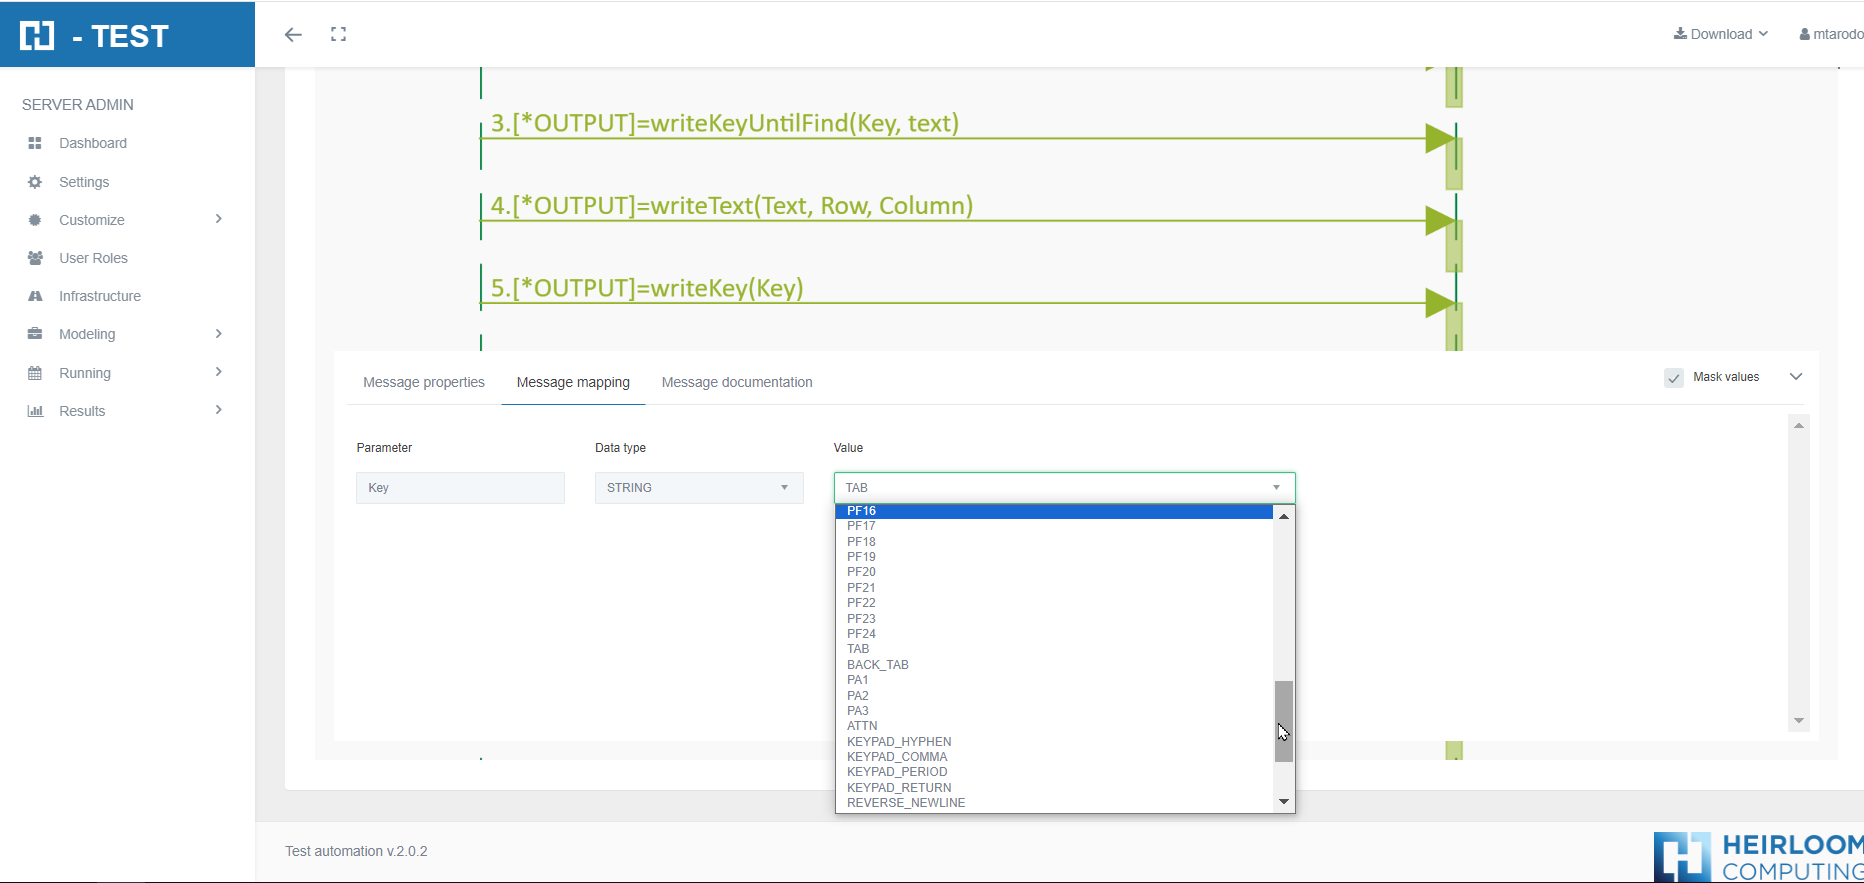
Funciones que hemos utilizado con el Adaptador Host 3270:
-
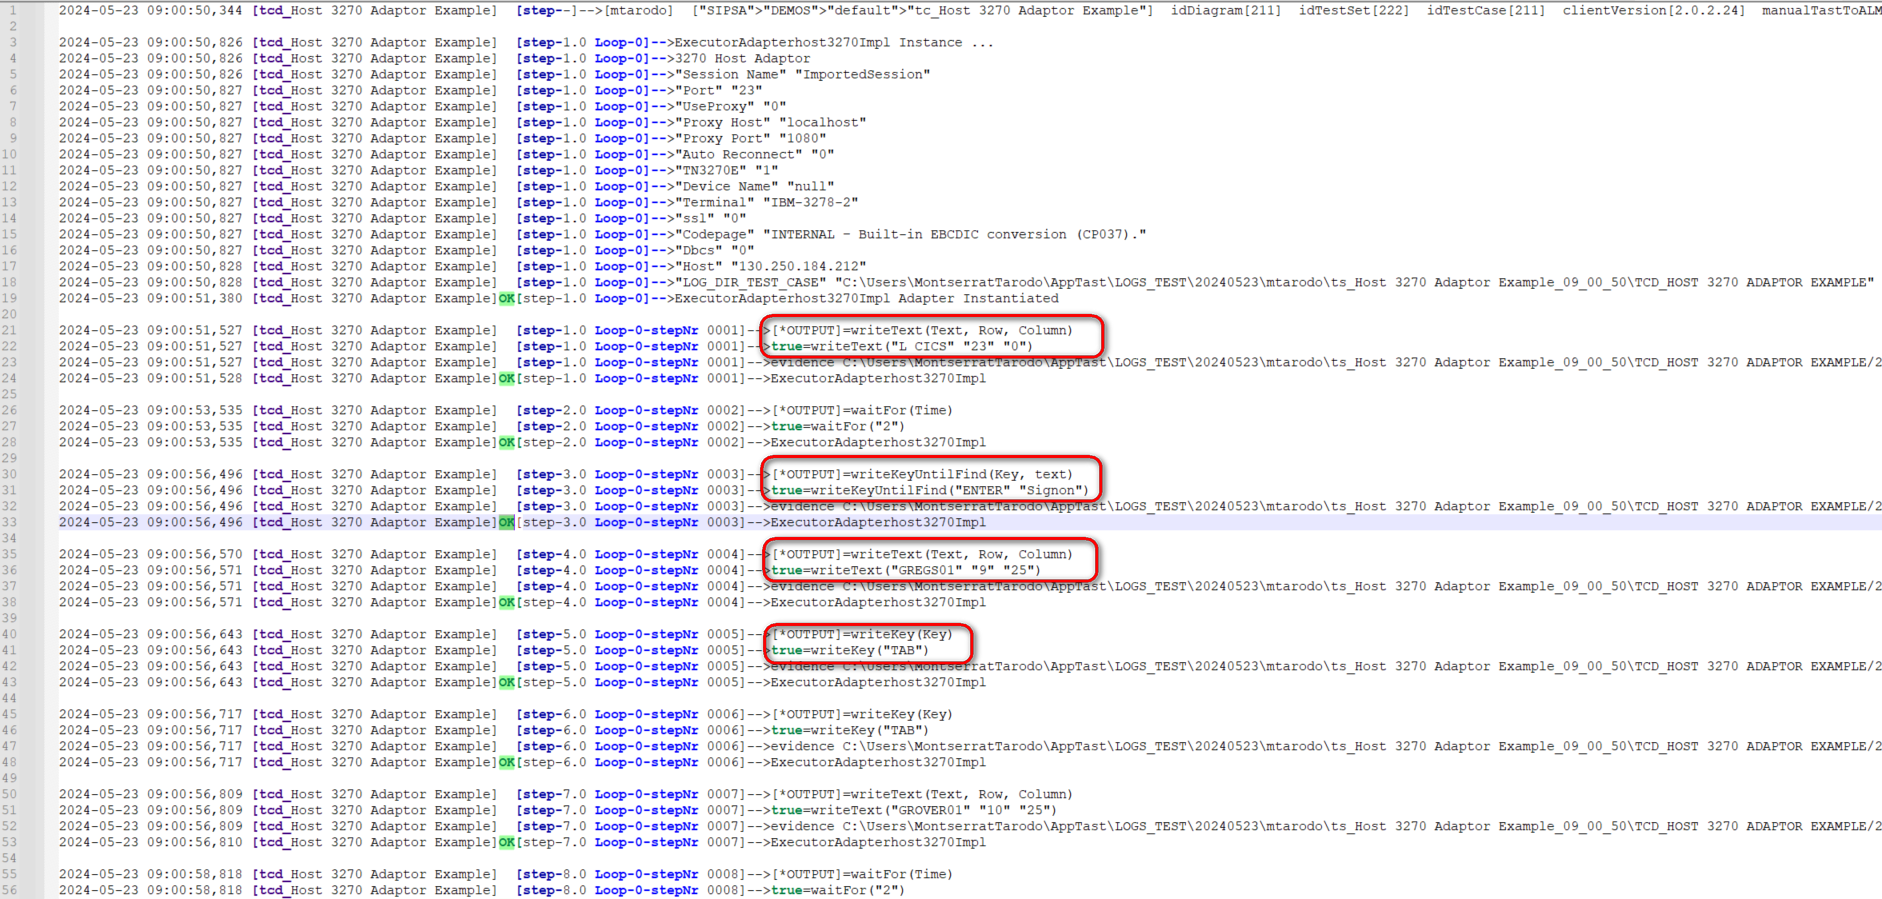
waitFor: wait for the time in seconds received in the parameter to elapse. The value we have indicated as timeout is:
-
2 seconds.
-
-
writeKey (Key): this function executes a predefined key on the screen.
-
writeKeyUntilFind(Key, Text): this function executes the function key (Key) and waits for the text (Text) to appear on the screen.
-
writeText (Text,Row,Column): this function writes a text in a defined position.(line and column).
-
Parameter Text: value→ text to write.
-
Parameter Row: value→ row Number.
-
Parameter Column: value→ column number.
These parameters are obtained by right-clicking on the screen we want to display.
-
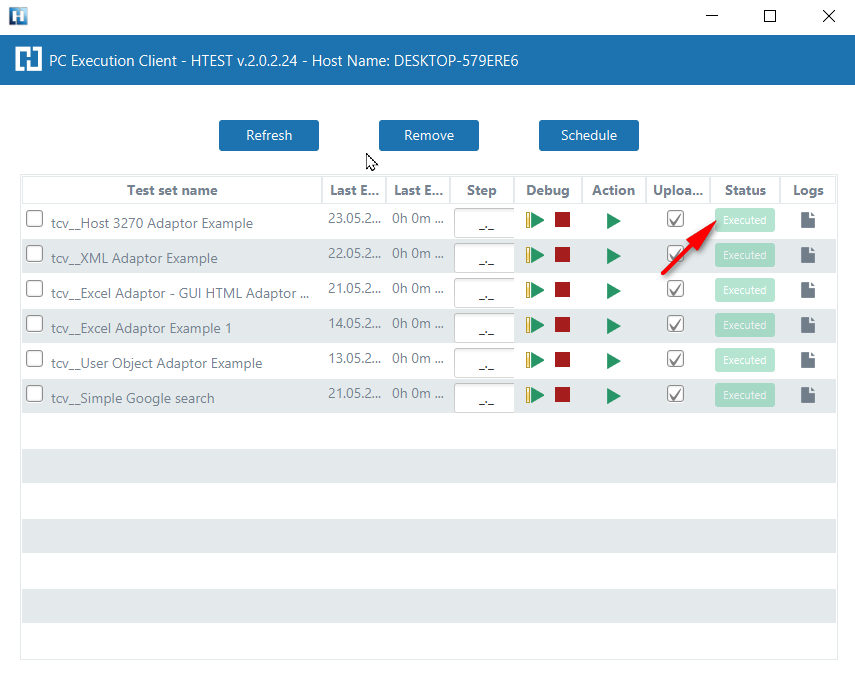
Ejecución del Test Set
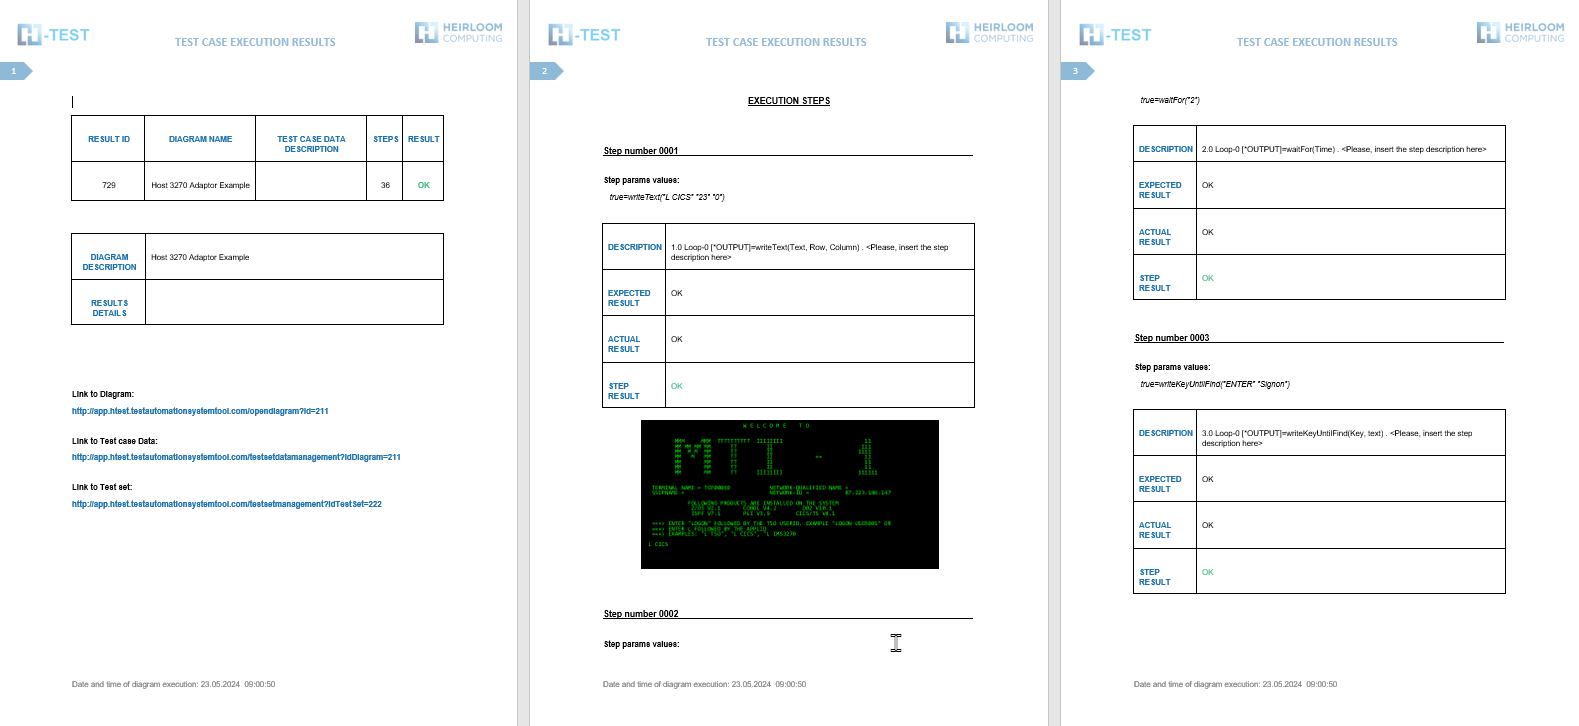
When we finish executing this test case, we see if it has been executed correctly:
Captura de resultados
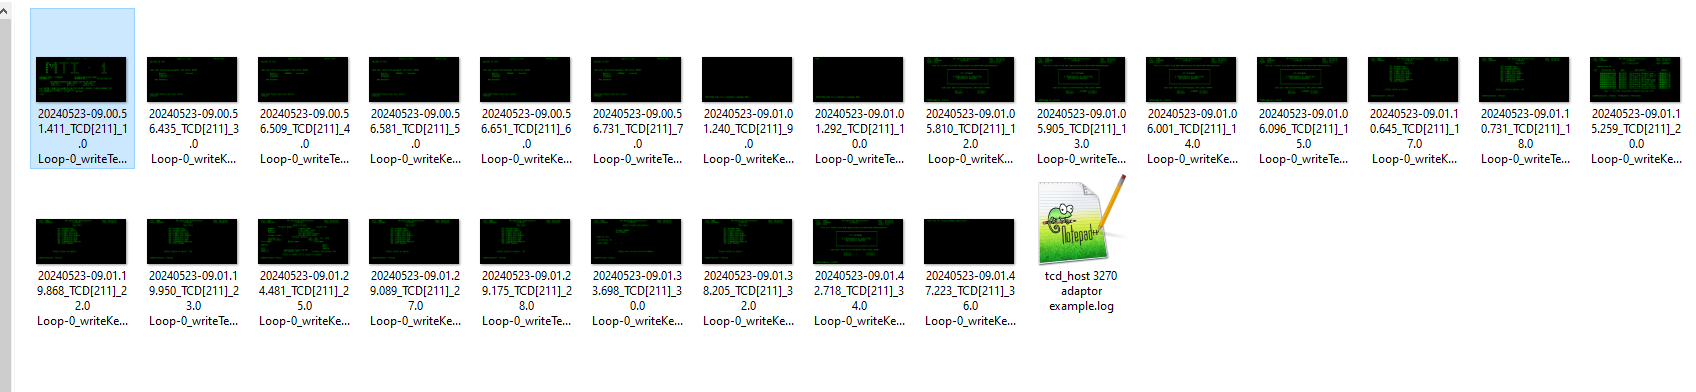
Al terminar de ejecutar este caso de prueba, tenemos como resultado la carpeta de evidencias, donde se almacena el log de la ejecución, como los ficheros que se hayan podido generar.
We then open the icon on the right (marked with a red arrow) and we have as a result the evidence folder, where both the log of the execution is stored, as well as all the screenshots, files, etc... if we have checked the "Evidence" box in the general settings of the diagram.
Carpeta de evidencias
Log de la ejecución
When returning the results, H-TEST returns a Word document, detailing the steps we have taken, the results obtained from each step, the links to the diagram and the test set, if we have clicked on download document in the Results box.